Did you know you can build a lead form for your website, so your leads can all go into CostCertified?
Important note
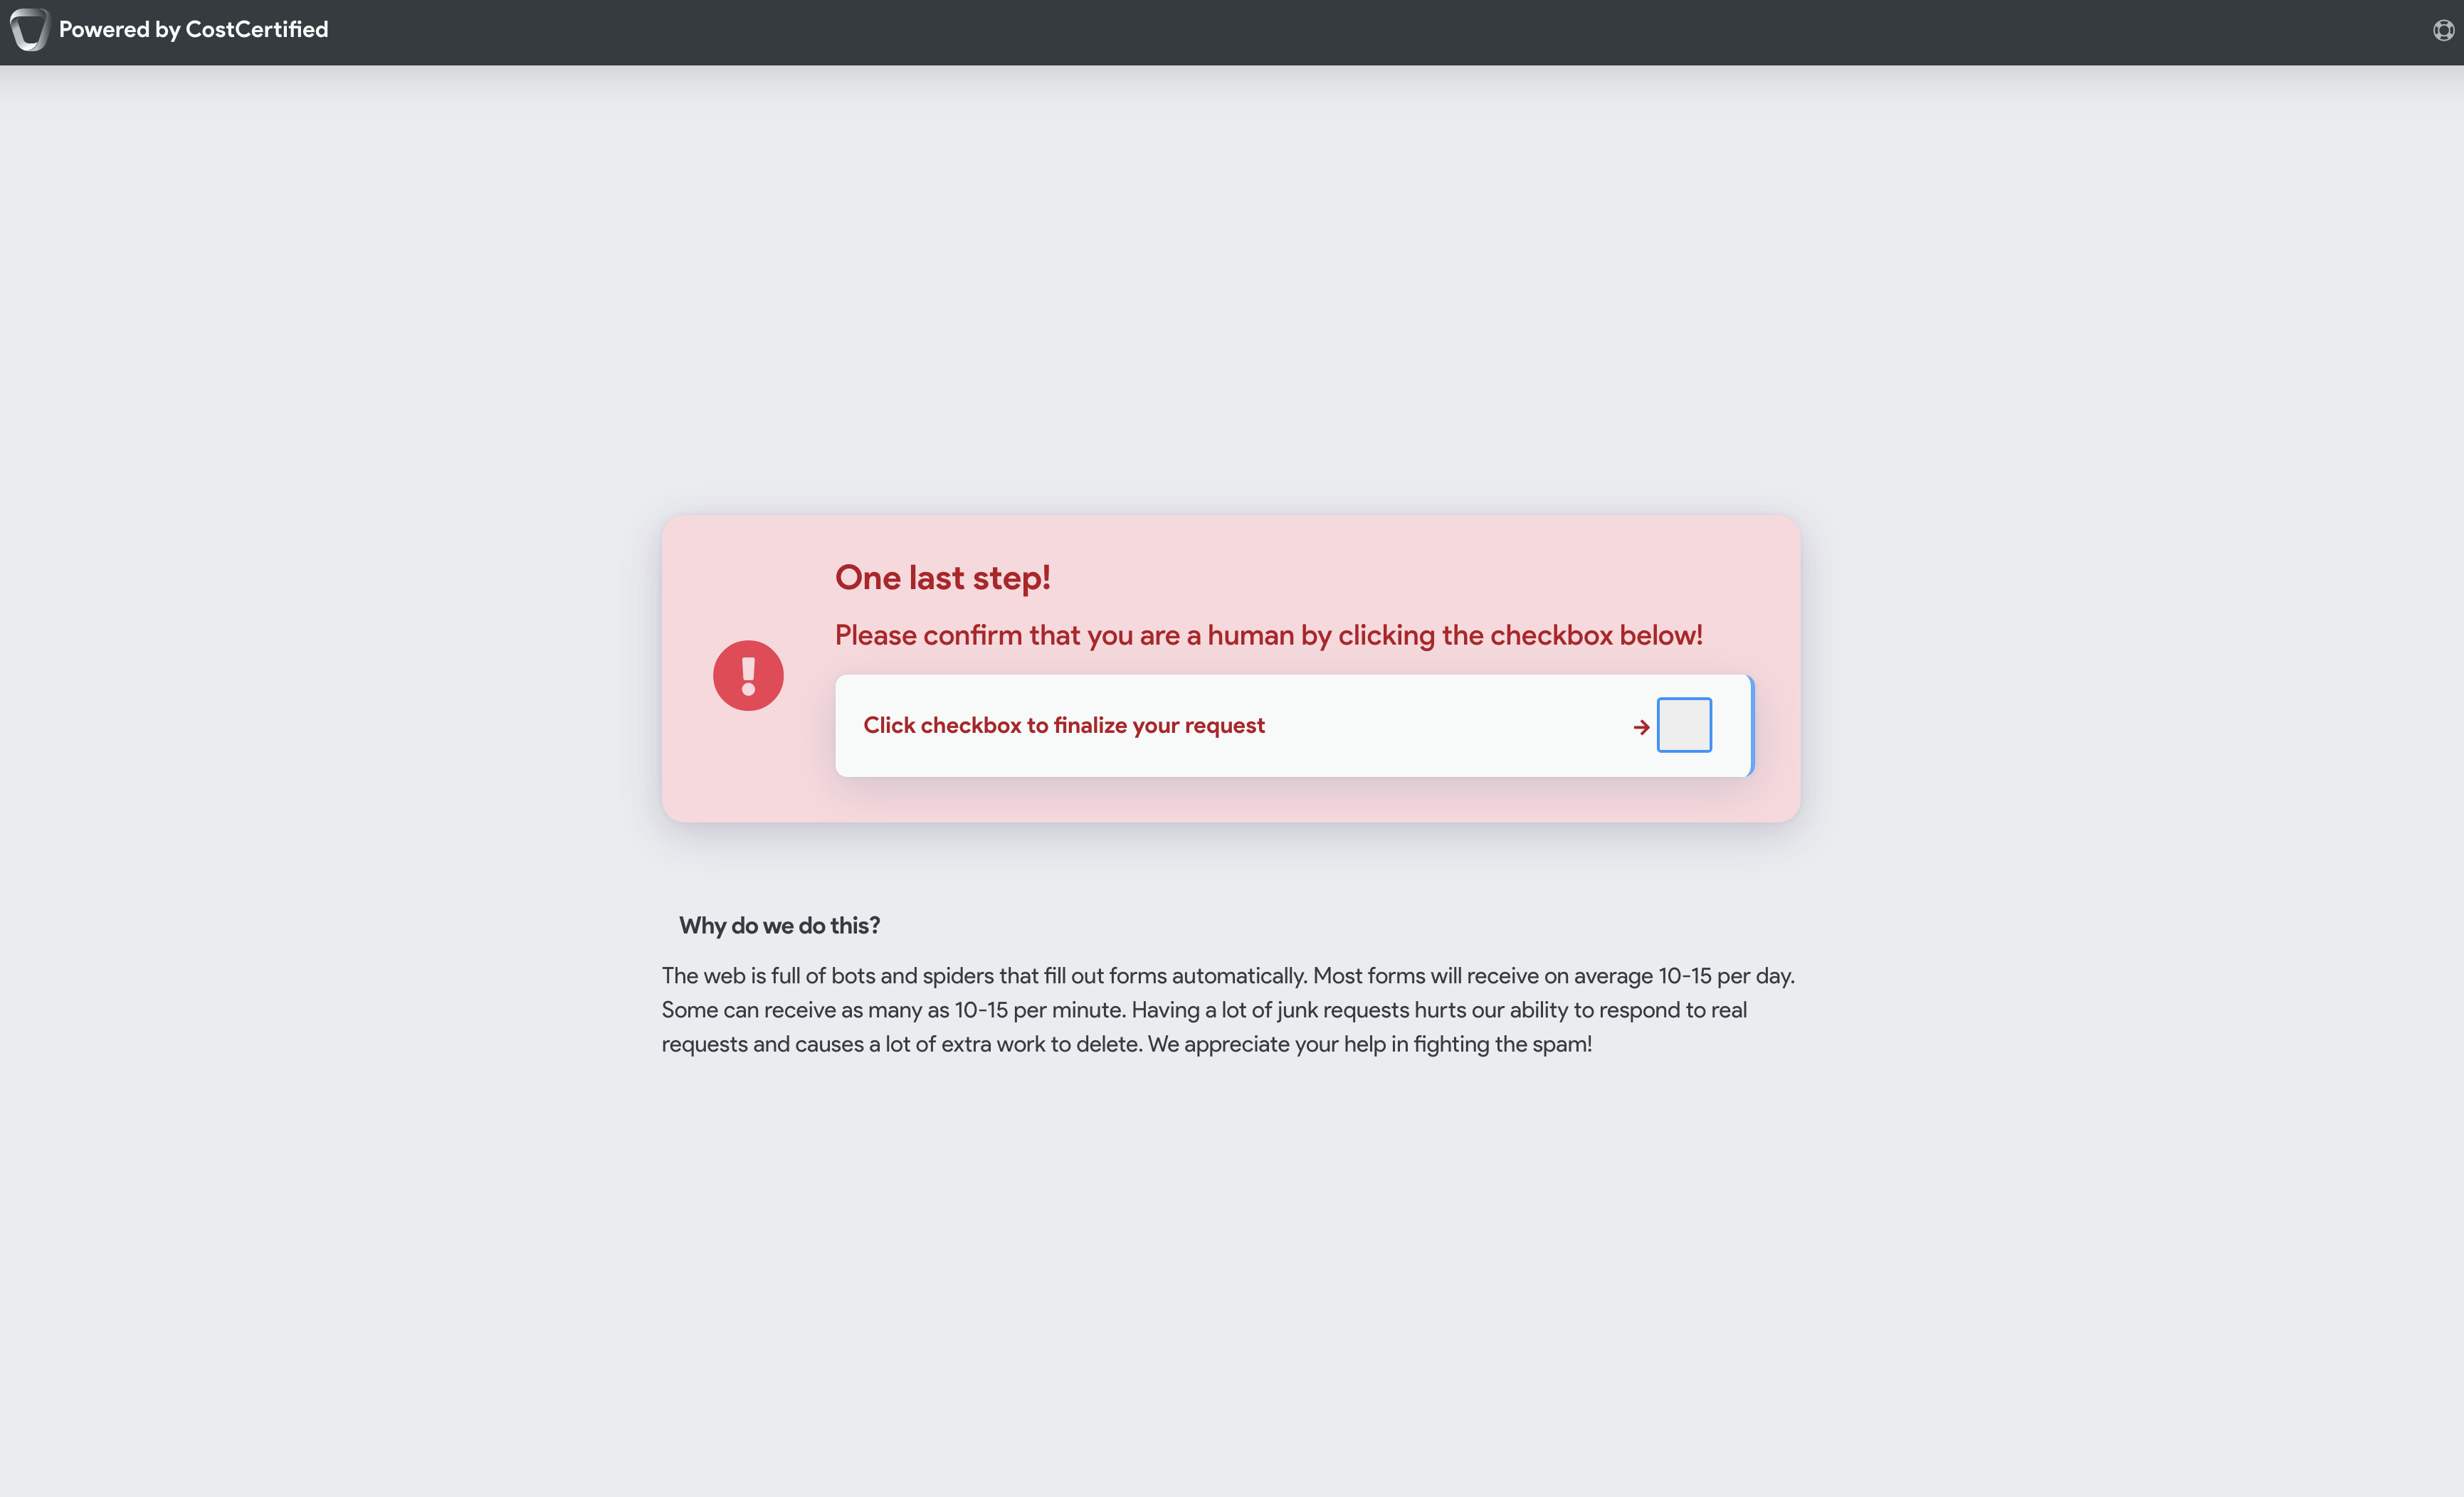
Currently CostCertified does not provide an implementation of reCaptcha or similar to filter out bot/junk leads. We strongly recommend implementation of that along with your form. It is simple and easy, see https://developers.google.com/recaptcha/docs/v3 for more information. If you don’t implement this pre-submission, you WILL receive many junk leads.We have implemented a standard and automated bot/spider filtering system. After making a request, your leads/potential clients will be routed to an intermediary page that will ask them to mark a checkbox, and then the lead will be fulfilled. Implementing reCaptcha is no longer necessary. This is what your leads will see:
Some things you can achieve with lead forms
...
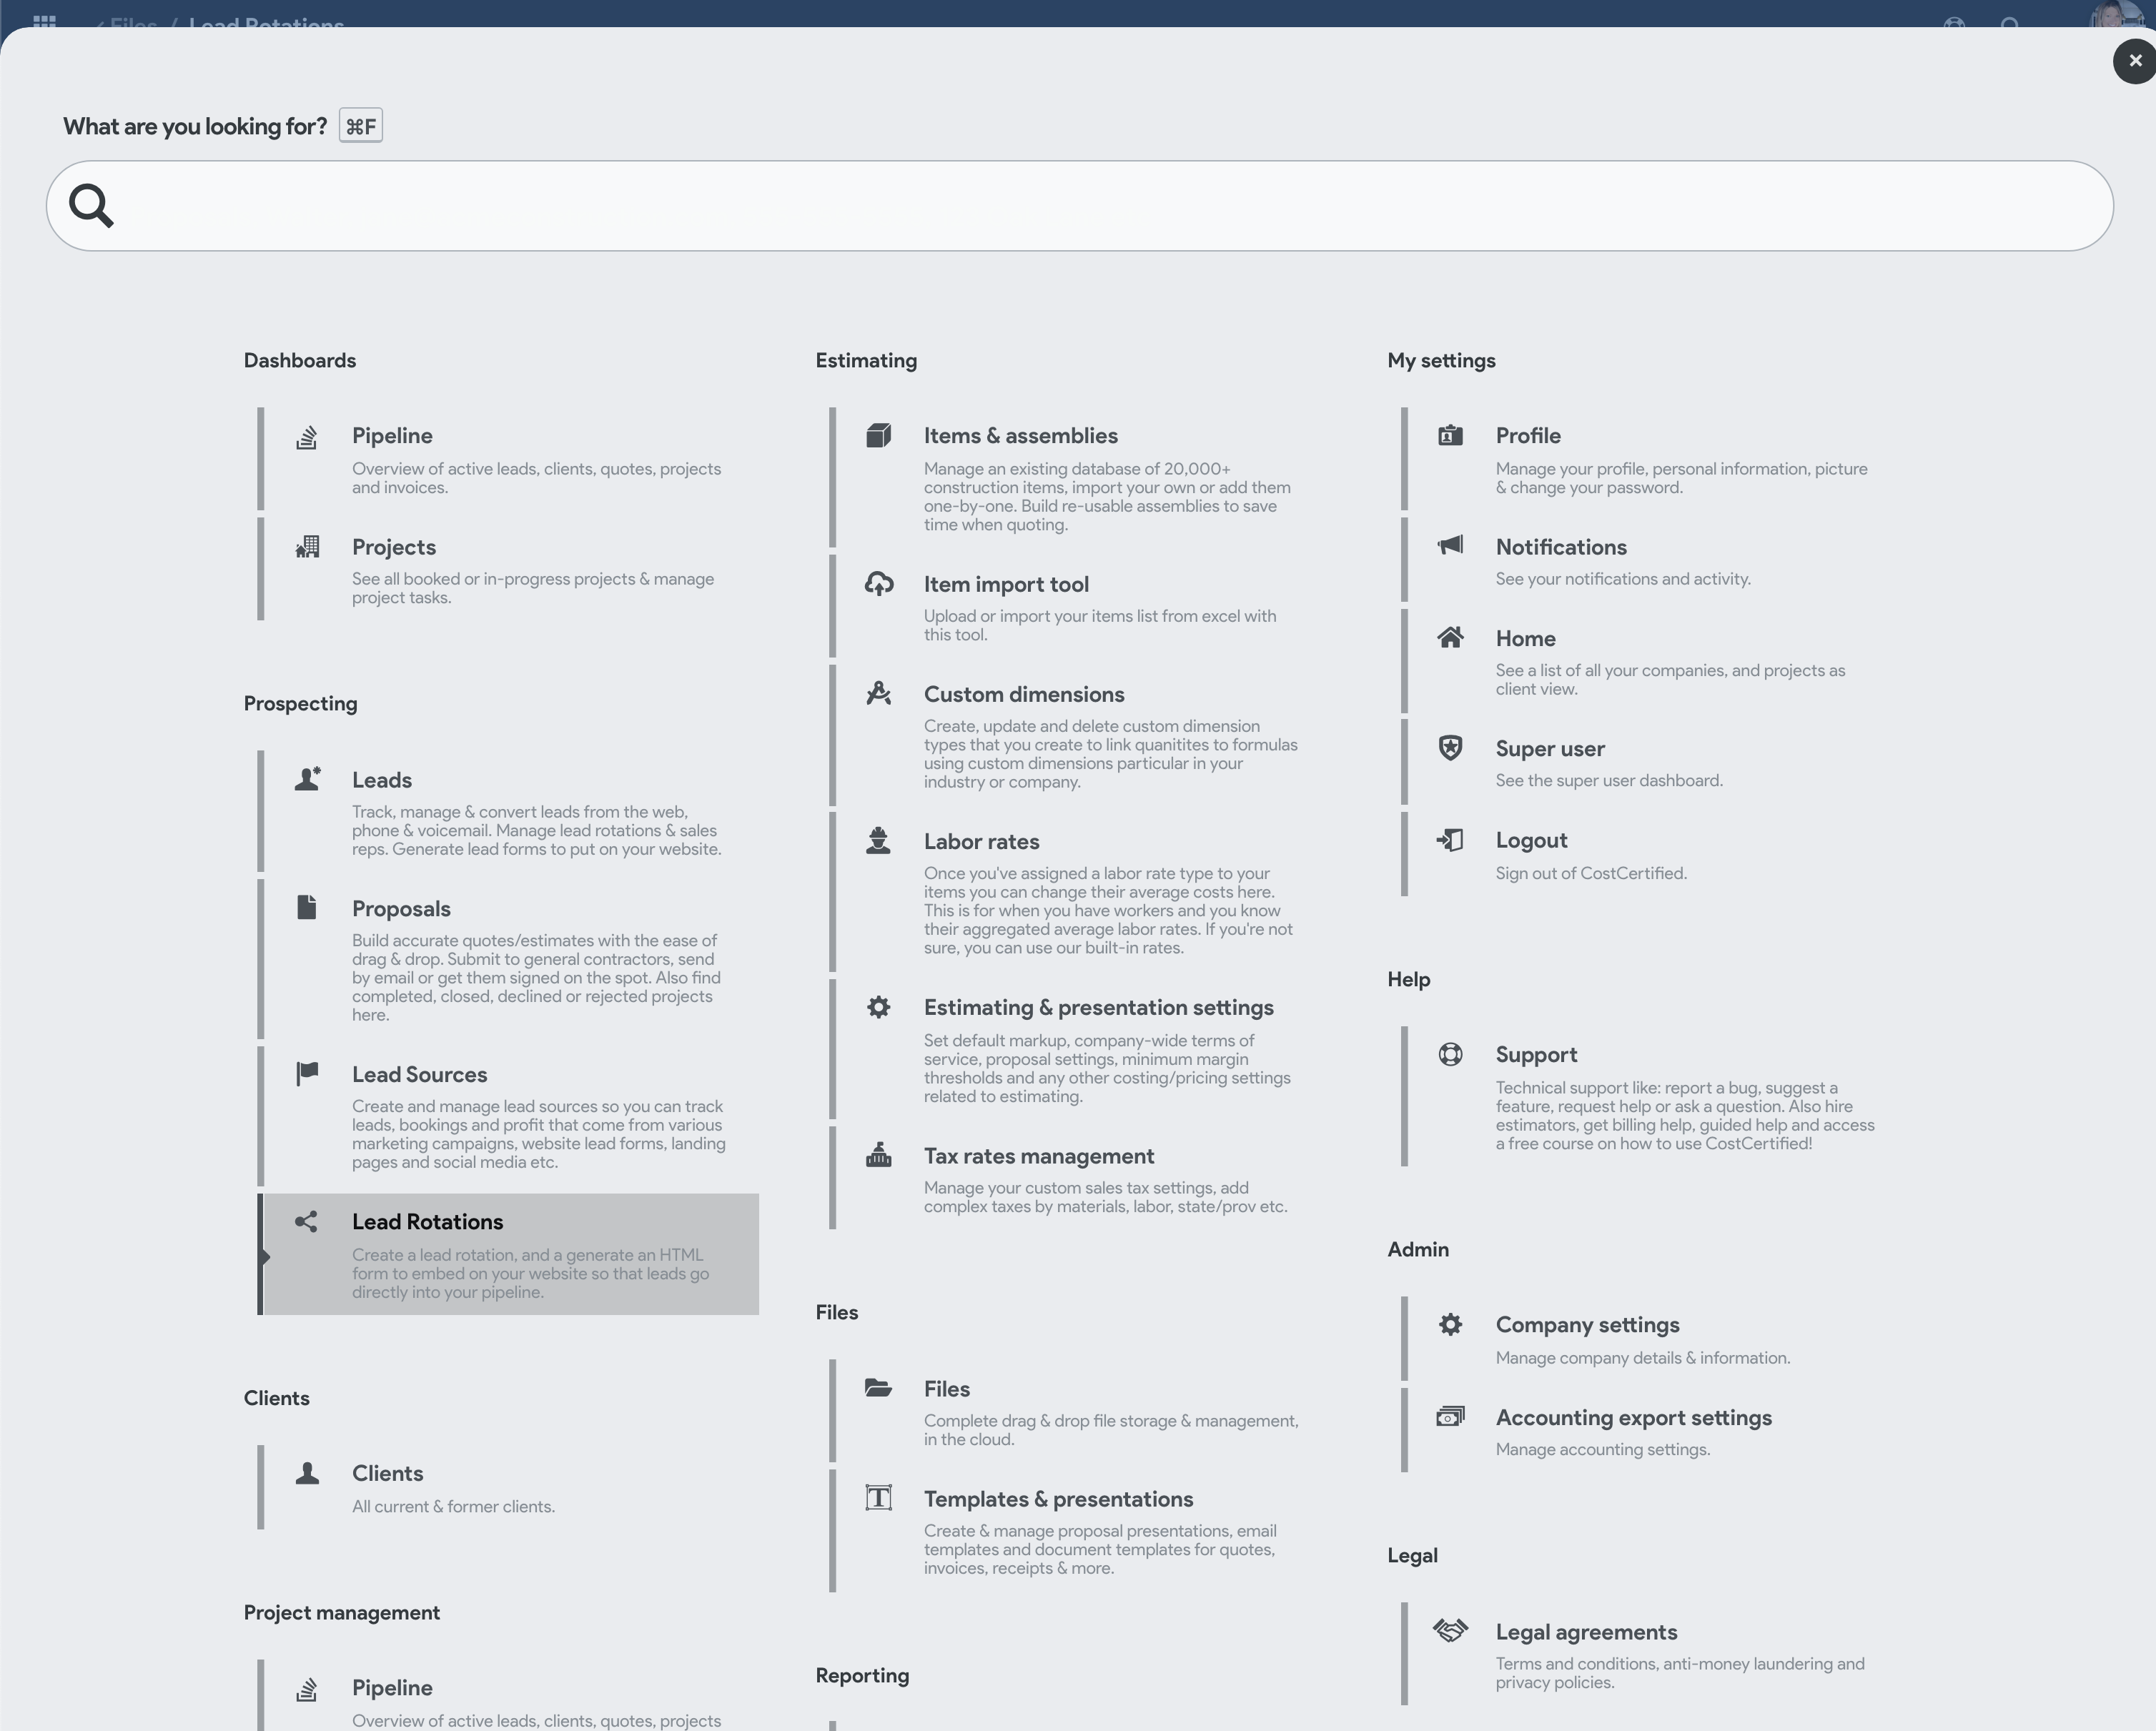
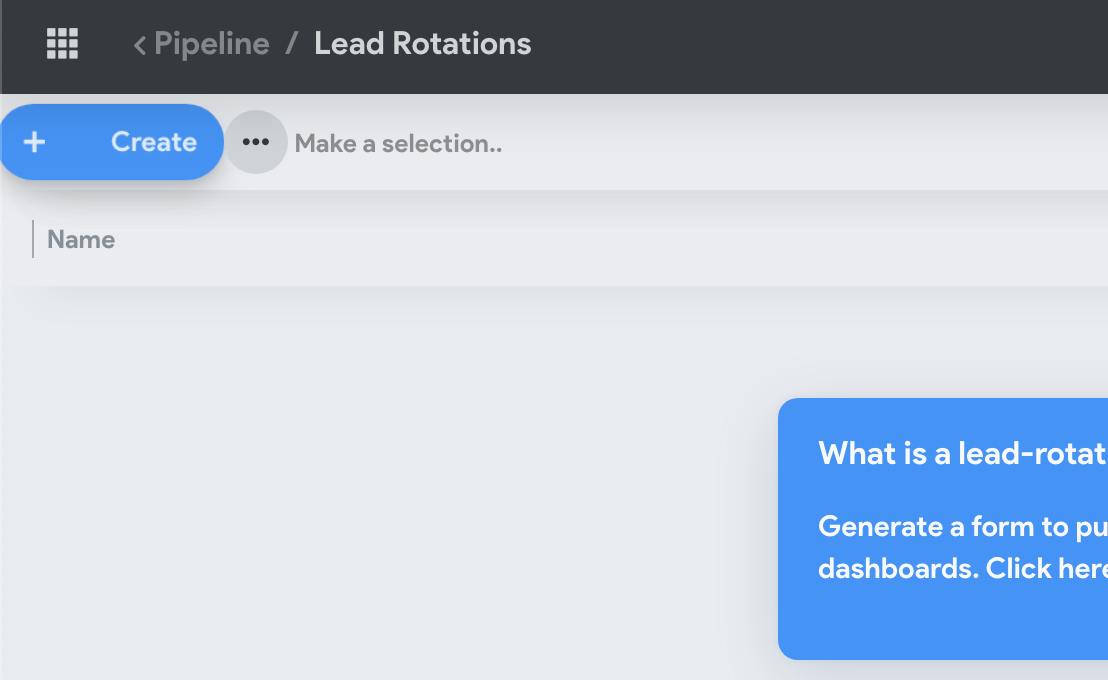
Go to the Lead rotations page
Create new Lead rotation
Add a name for your lead rotation
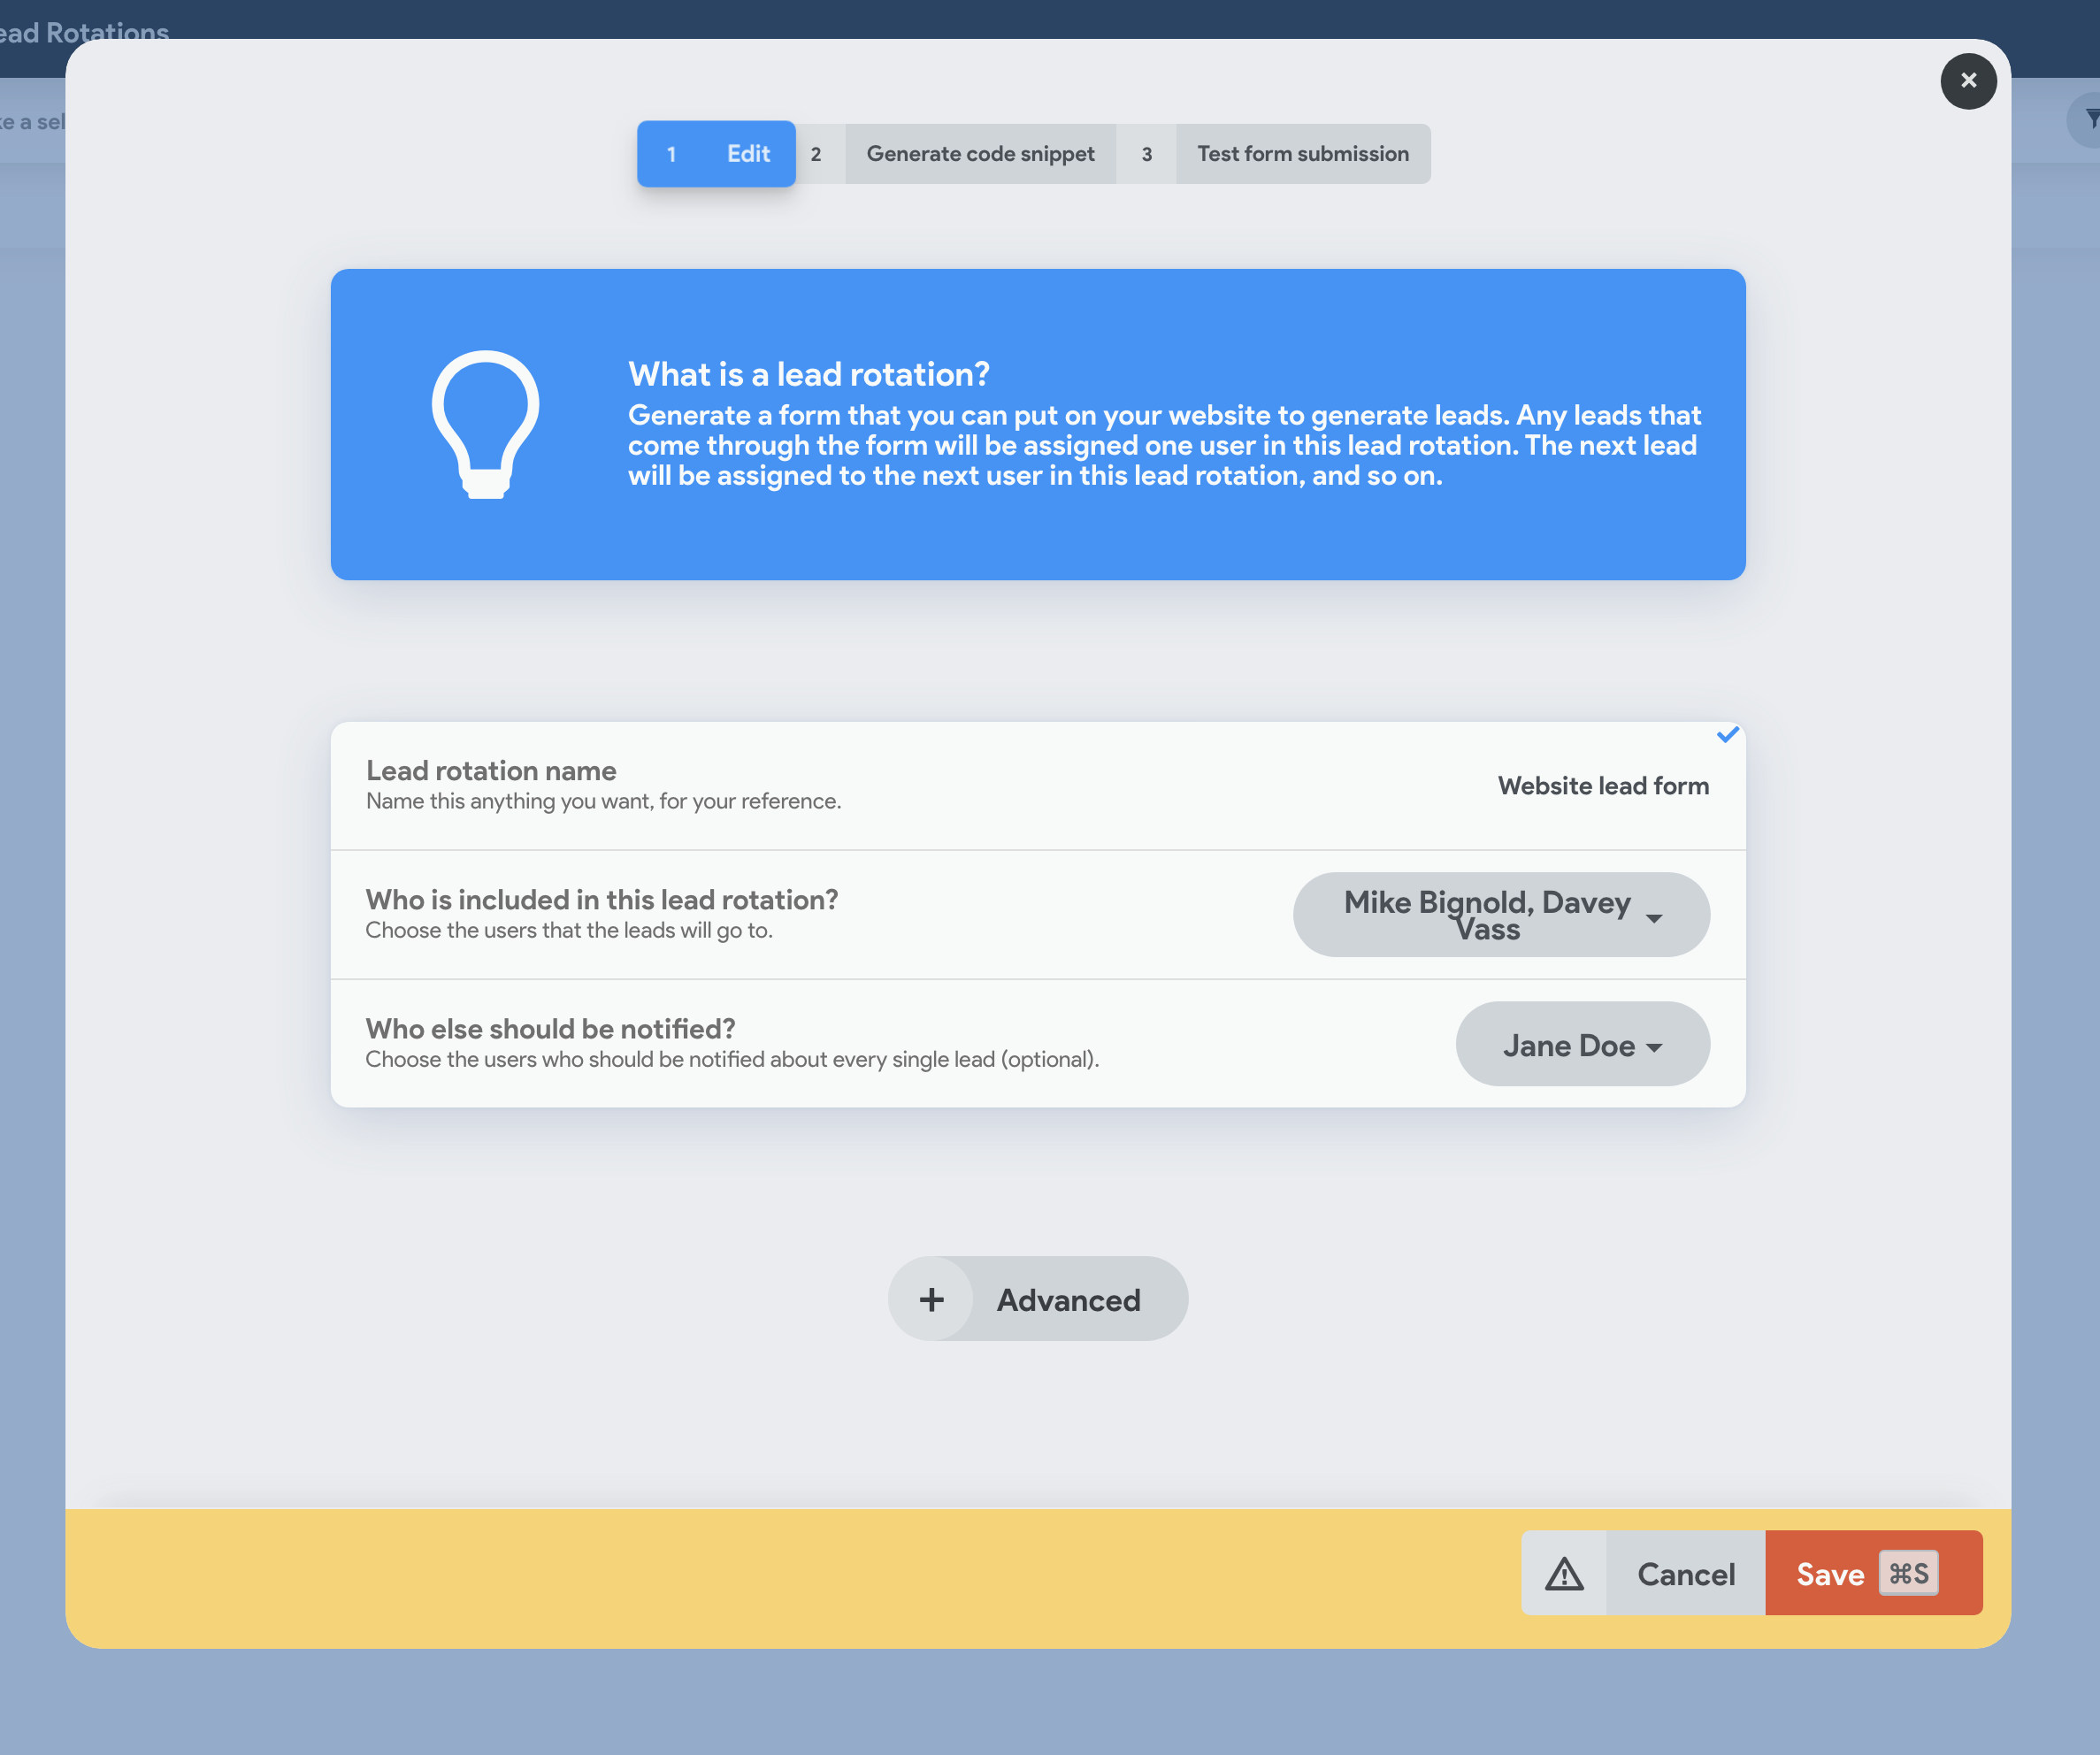
Choose which of your users are included in the lead-rotation. These users will be assigned leads on a round-robin.
You can also choose multiple users who will be notified for each lead regardless of who it goes to in the round-robin (Who else should be notified?). Great for an office manager, front-desk, sales manager or owner etc. (optional)
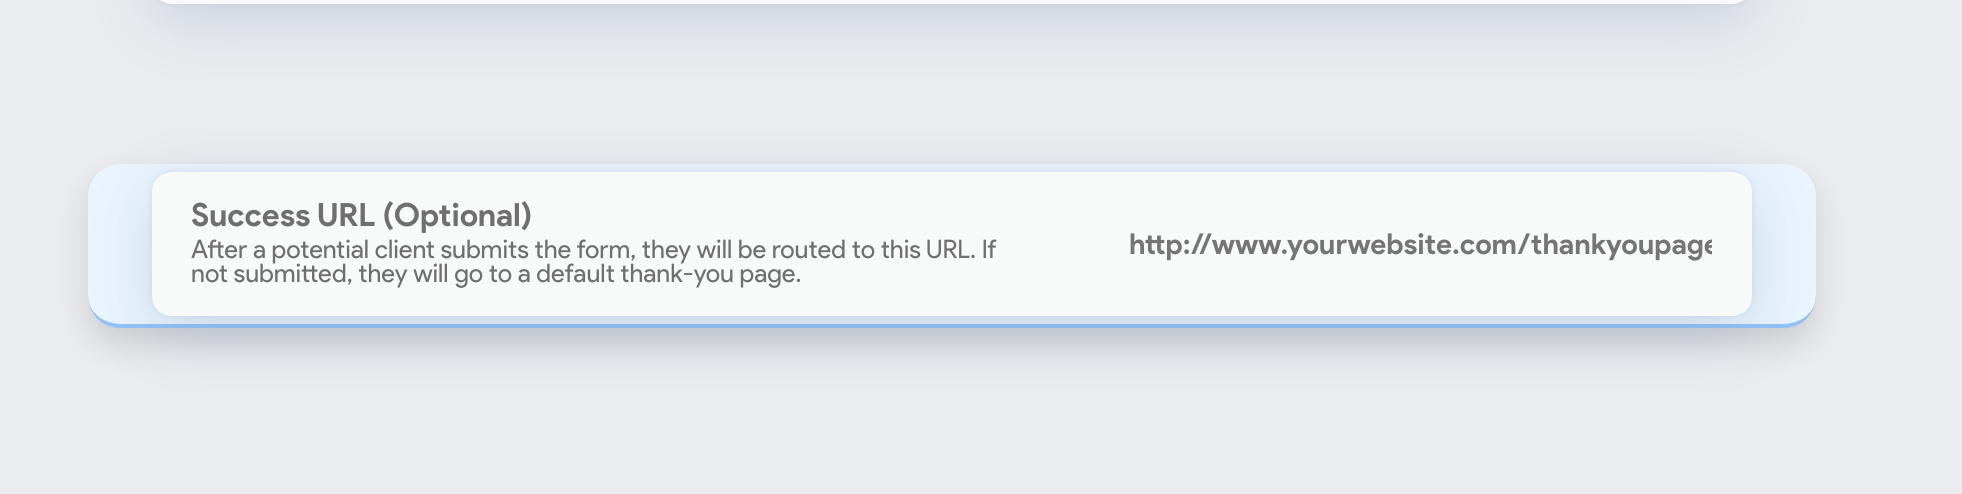
You can also add a success/thank-you URL. Click on Advanced and enter your link the Success URL field.
By default leads will get an email thanking them for submitting the lead form, and they will be shown a generic thank you page. You optionally can specify your own success page that they will be sent to after submitting the lead.
Save the lead rotation
Now go to the tab on top called Generate code snippet
You can specify a lead-source for the code snippet, or your webmaster can use any of your lead-source ids to dynamically change that field on your website depending on analytics data about the source of the lead (adwords, facebook, bing etc), and change that field on the fly.
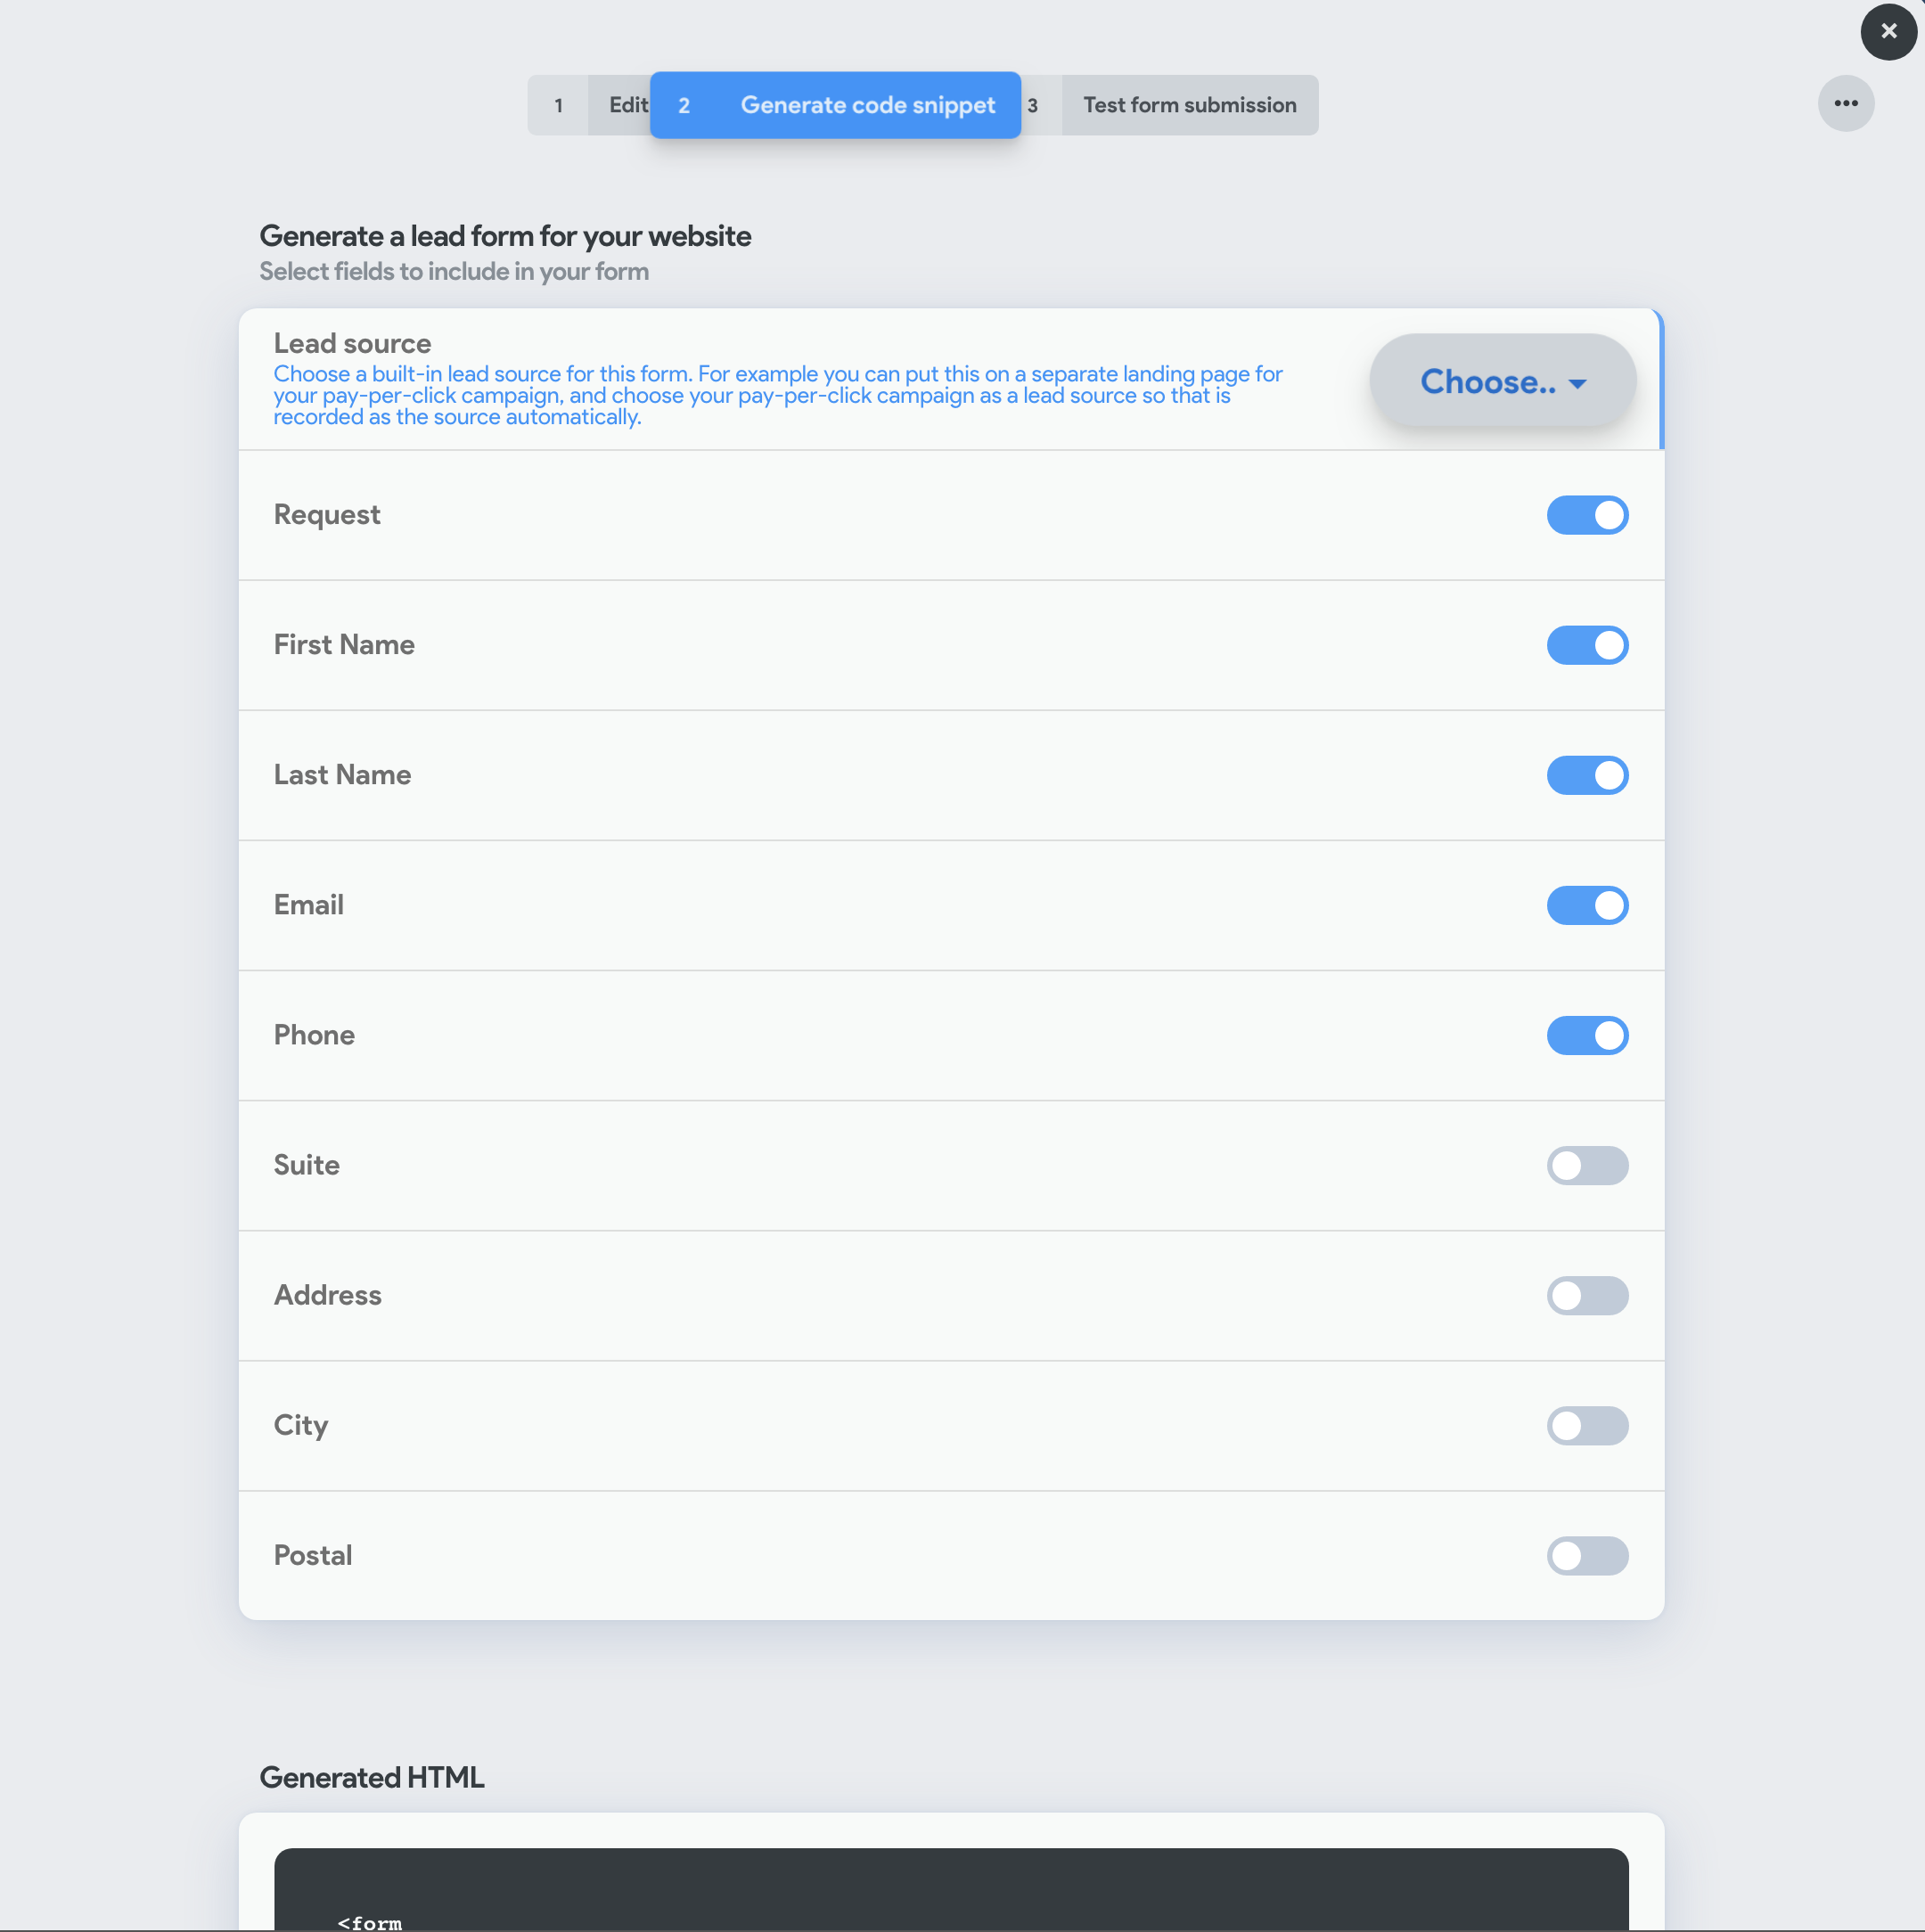
To manage lead sources you can go to the Lead sources page from the services menu
Specify the default fields you want to collect for the client.
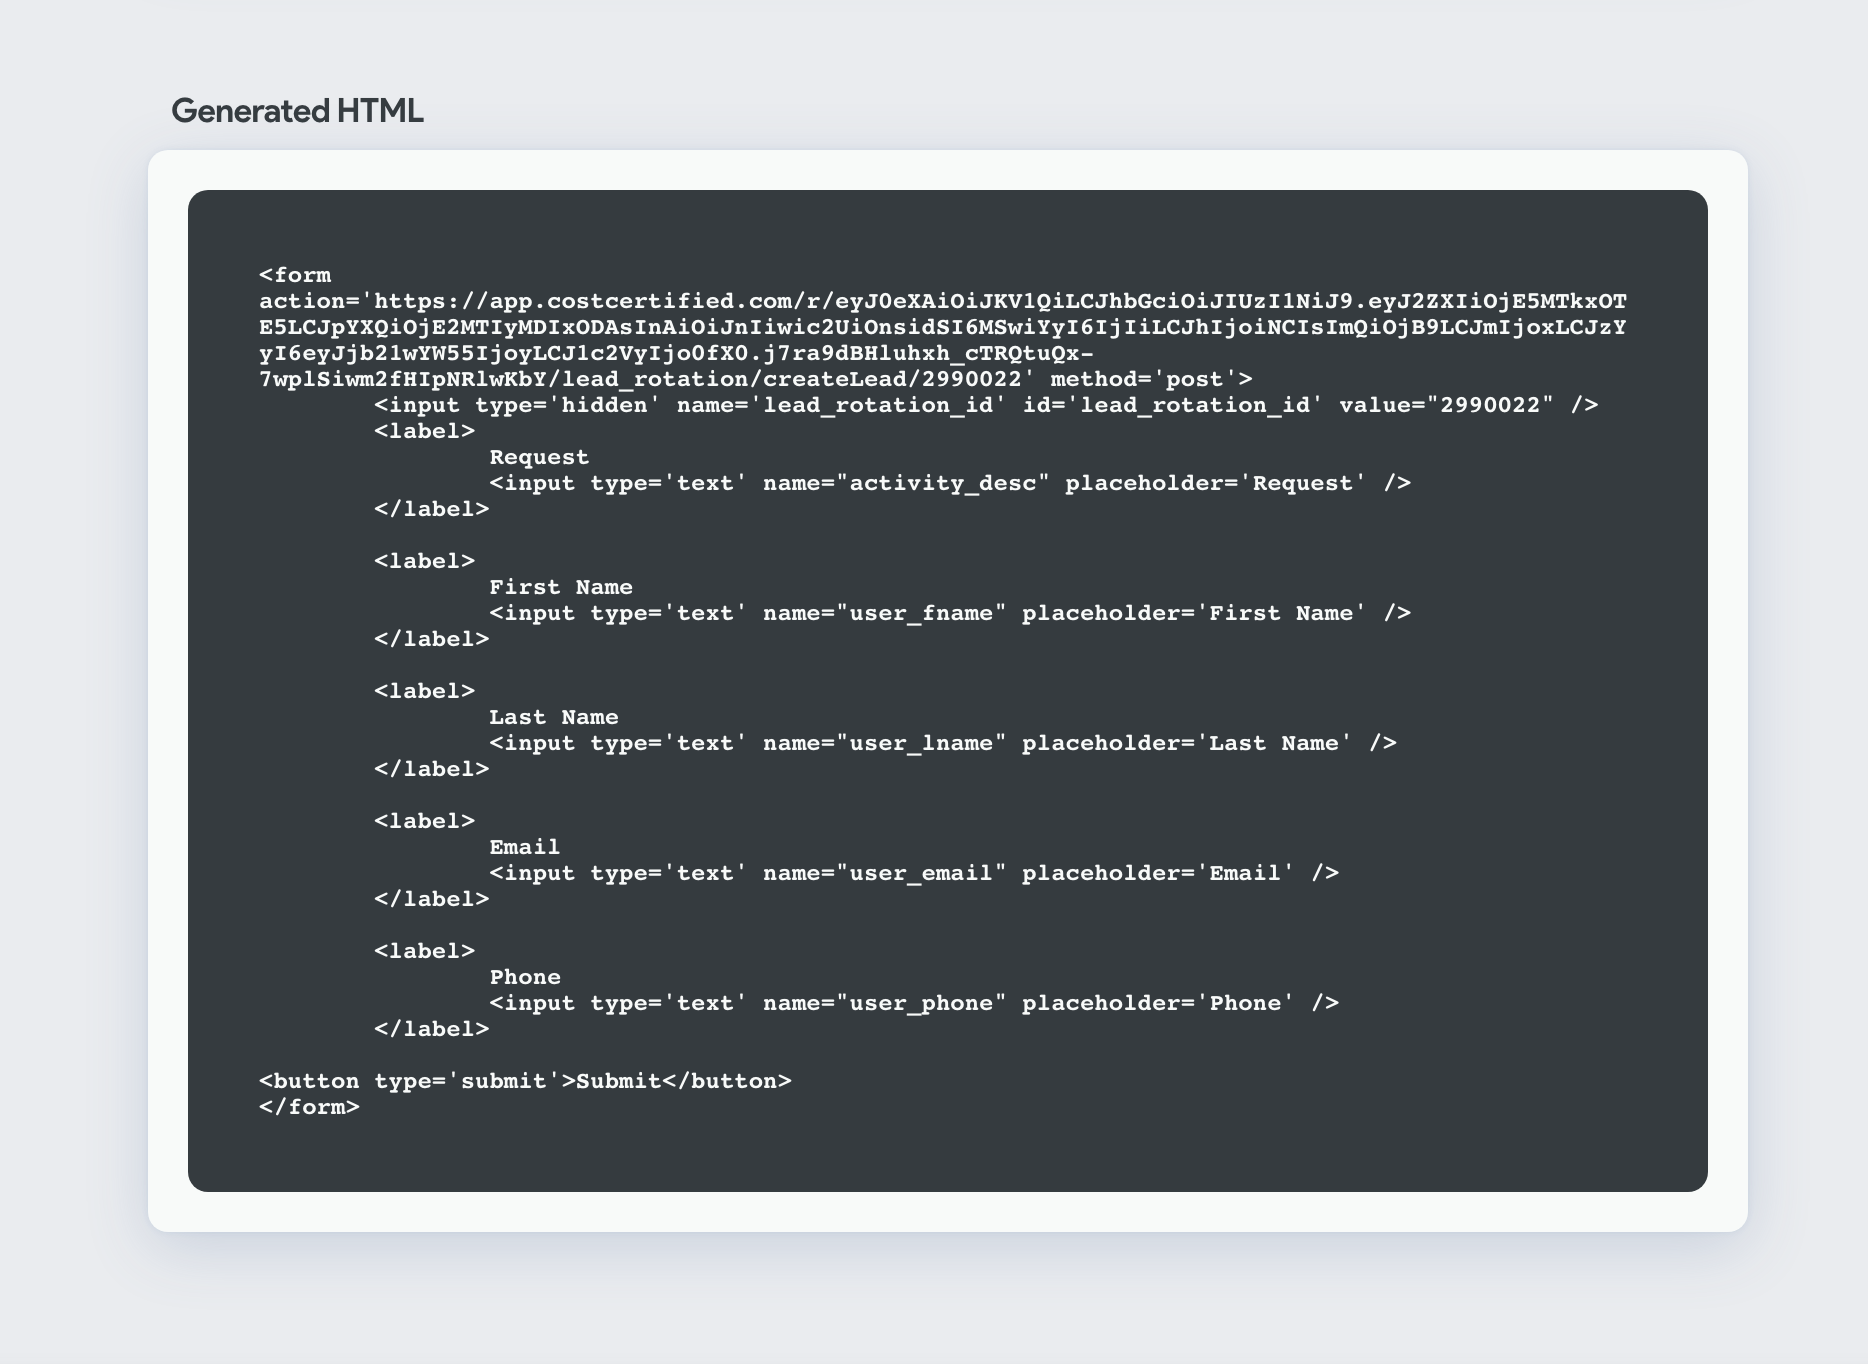
Copy and paste the snippet at the bottom and give it to your webmaster or add to your website yourself

The snippet is provided without styling. Feel free to style it however you like according to your website/branding.
Required fields are: lead_rotation_id. We recommend making one form of contact required, either user_email or user_phone, and at least a first name user_fname.
When a new lead comes in, the user who receives the lead from the round-robin receives a notification by email, and it will show up in their email. Any users in the Always notify field will also receive a notification. Managers can see the lead by going the the pipeline and filtering by the user that received the lead.
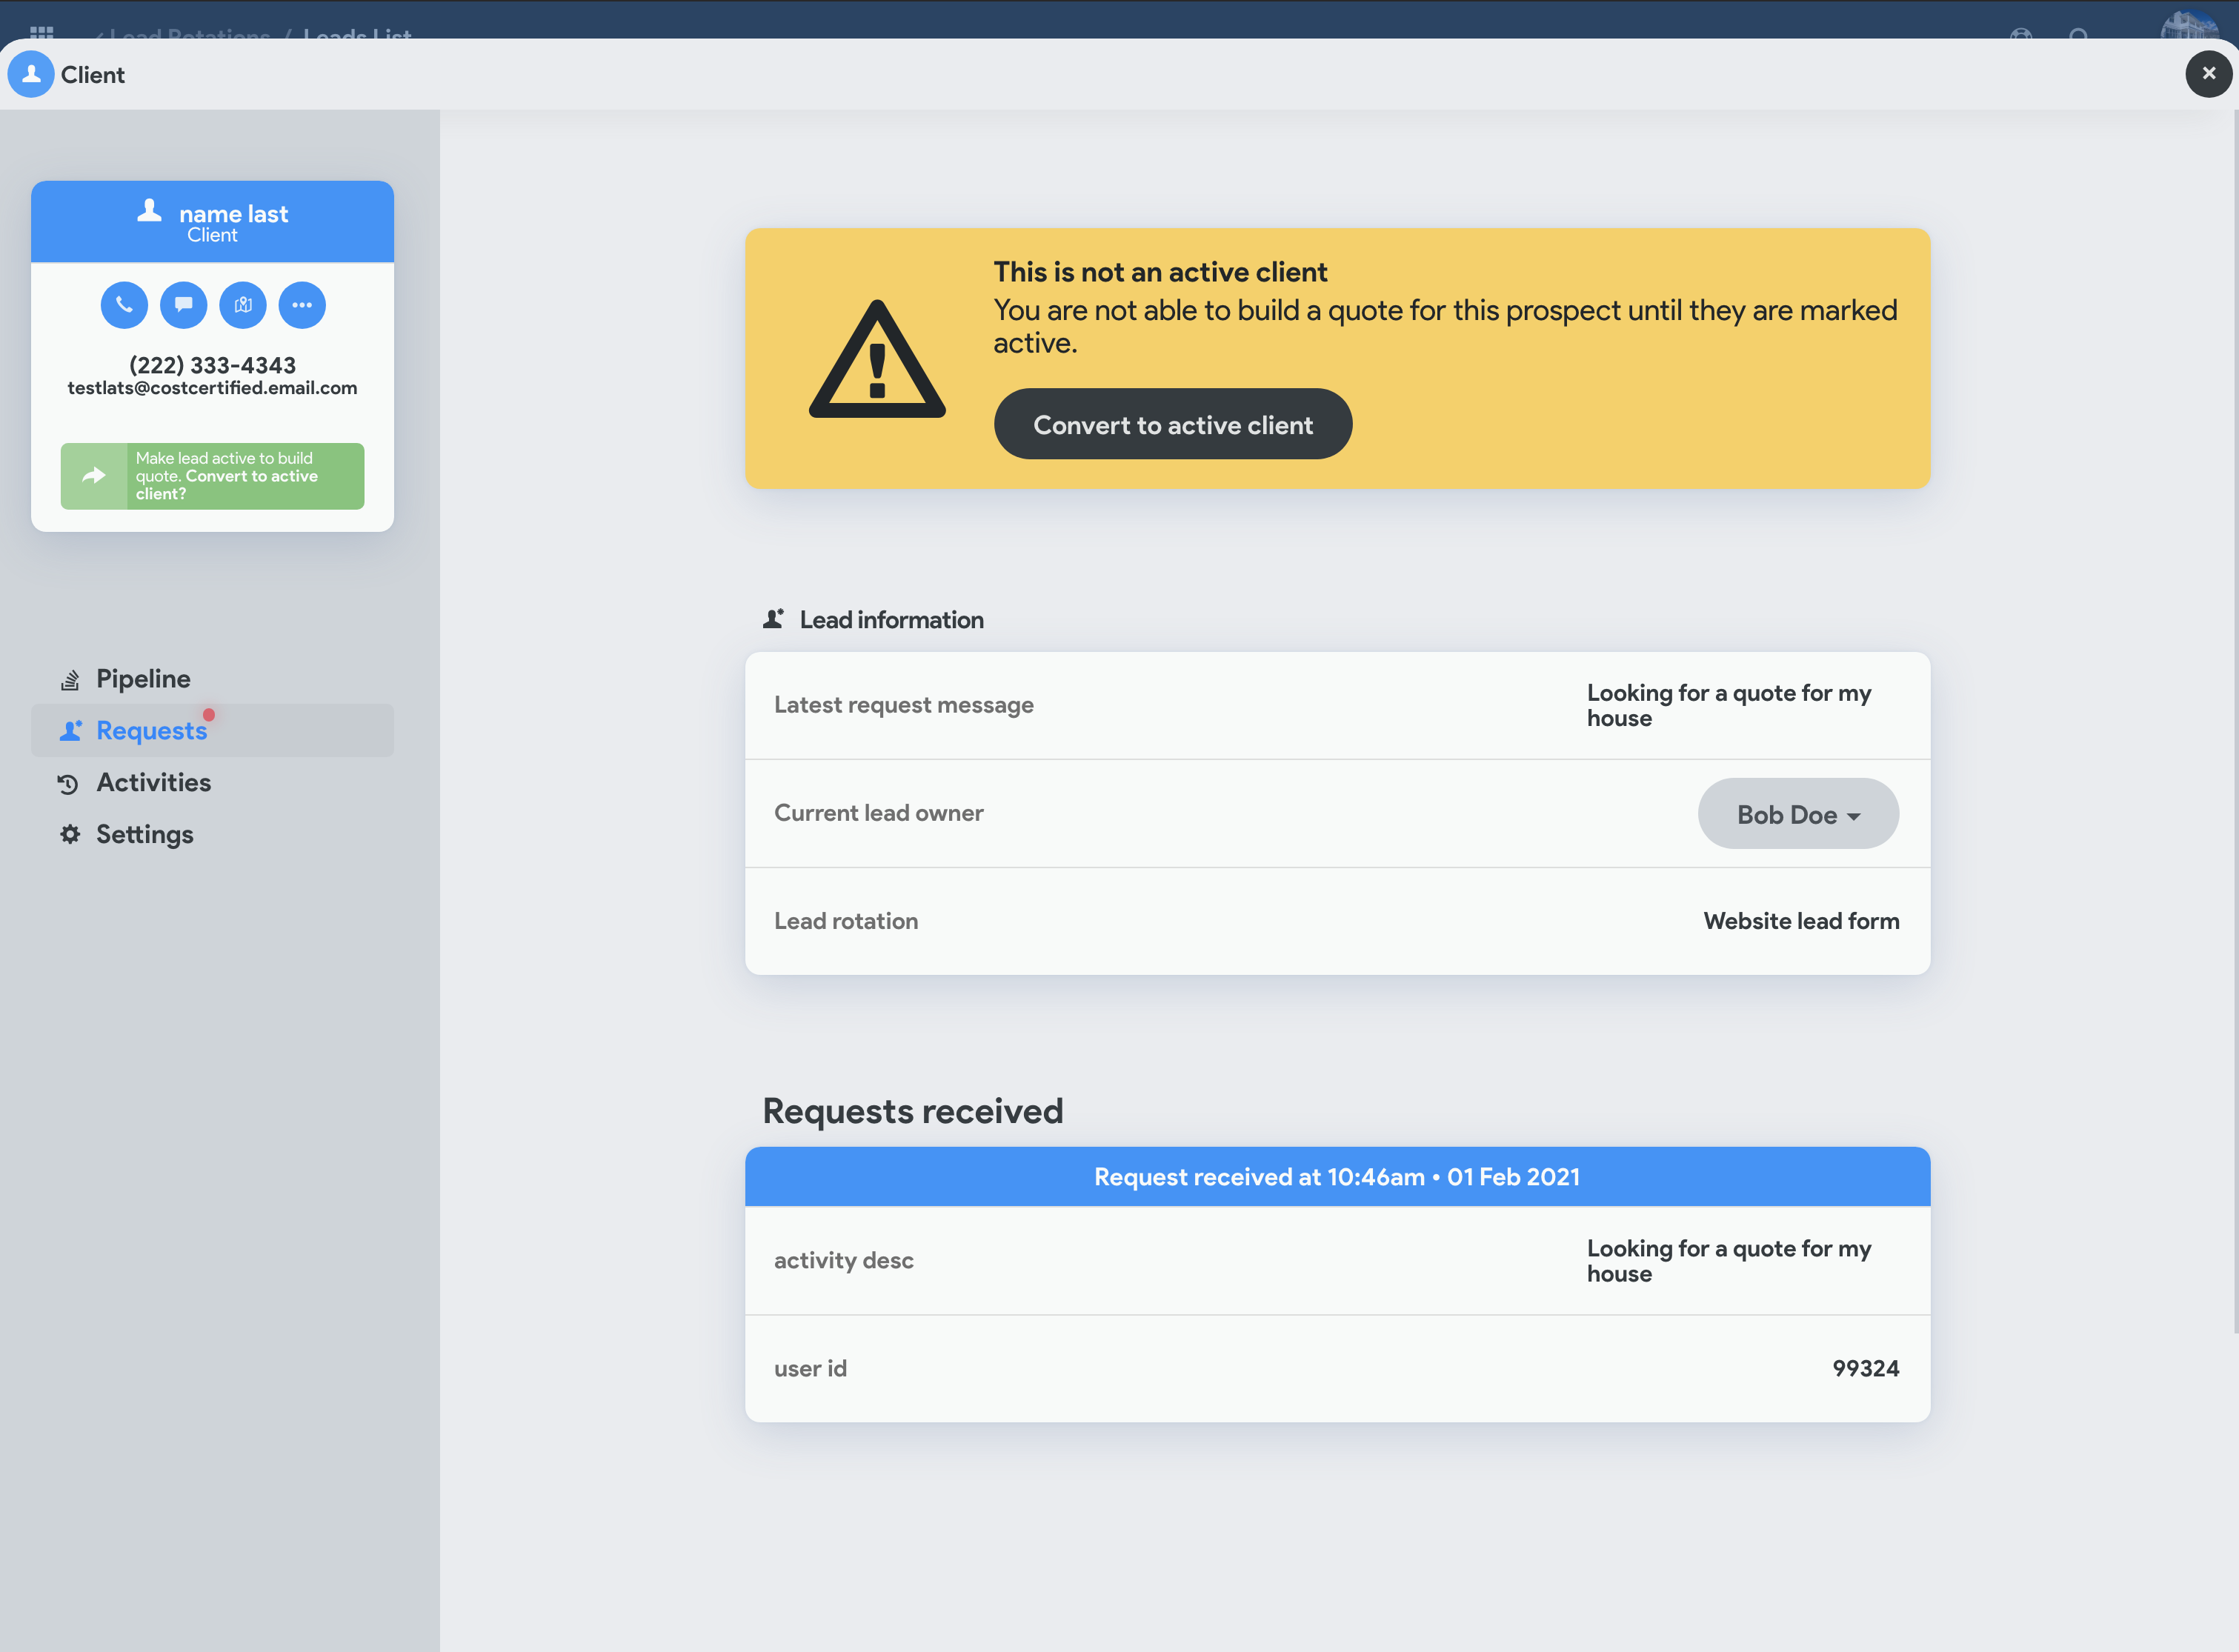
When you have contacted the client and confirmed their contact details, be sure to Convert it to active client. This will make sure it shows up in the right column in the pipeline to indicate that contact has been made, and from there will prompt you to create a new proposal for them.
 Currently our form does not come built-in with any sort of anti-bot filtering. You will likely get many junk leads if you do not implement some sort of re-captcha. You should implement something like Google’s reCaptcha to avoid junk leads. It is free and simple. https://developers.google.com/recaptcha/docs/v3
Adding custom fields
You can add custom fields and they will appear on the lead on the lead information page
Any fields that have an official CostCertified version (first name, last name, email, phone, city, postal/zip, description/request) must use our field naming format related to that field. Anything else that does not have a CostCertified field version can be named anything you like, and it will save and display on the lead.
For example, if we are collecting a first name it must be in the format user_fname, because that is the only way CostCertified will register it as a first name. If you are adding a custom field that doesn’t relate to anything in CC, then you can call it whatever you want.
Official fields:
user_fname - first name
user_lname - last name
user_email - email
user_phone - phone
user_address - address line 1
user_suite - address line 1 / unit / suite
user_city - city
user_postal - postal/zip
activity_desc - request / description field / long text
Note: if you build a form with an id or key of ‘firstName’, CostCertified will not register it as a first name and the lead will appear as if it has no first name. It must be sent as user_fname.
To add a custom field, just add extra fields inside the <form> of the code snippet with descriptive id/names, they will automatically be bundled and added to the Requests tab on the Client panel when you open the client.
Get your endpoint URL. Every lead-rotation has its own endpoint URL so it is important you get the one that is generated in the code snippet from the Generate code snippet tab from the lead rotation window. You can find it here:

You can also just include other key:value pairs if sending the data via CURL. Replace {your endpoint url from form code snippet generated} with your endpoint url.
Code Block curl '{your endpoint url from form code snippet generated}' --data-raw 'lead_rotation_id=2989995&activity_desc=New+request+comments&user_fname=John&user_lname=Smith&user_email=johnsmith%40smith.com&user_phone=4035555555'From javascript you can programatically send a lead by copying the endpoint URL from the form snippet and implementing the following script using the official fields. Replace {your endpoint url from form code snippet generated} with your endpoint url.
Code Block fetch("{your endpoint url from form code snippet generated}", { method: "POST", body: JSON.stringify({ user_fname: 'John', user_lname: 'Smith', user_address: '123 Pine Street', user_postal: '12345', user_city: 'City Name', user_email: 'email@email.com', user_phone: '12345678910', activity_desc: 'I would like a highly accurate quote on a renovation in record time!', customField1: 'My custom field value', customField2: 'My custom field value 2', }) }).then(res => { console.log("Request complete! response:", res); });