...
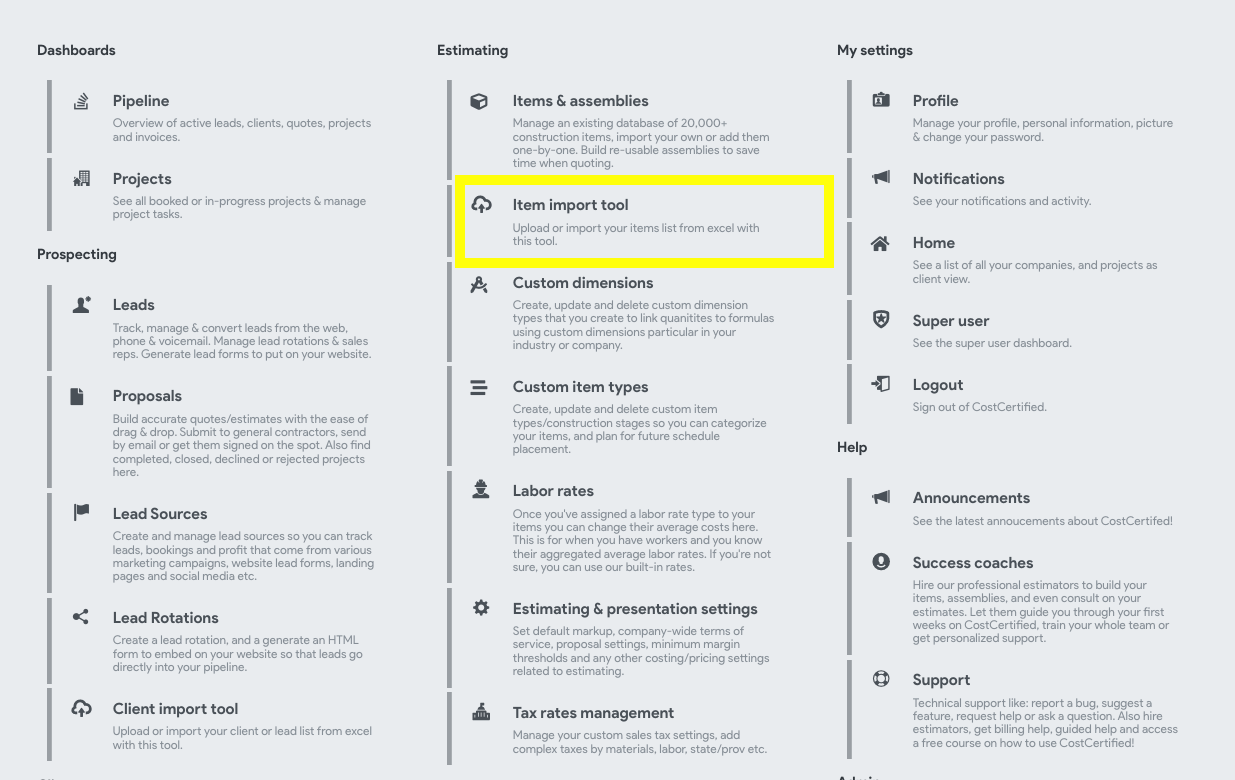
Go to the Item import page
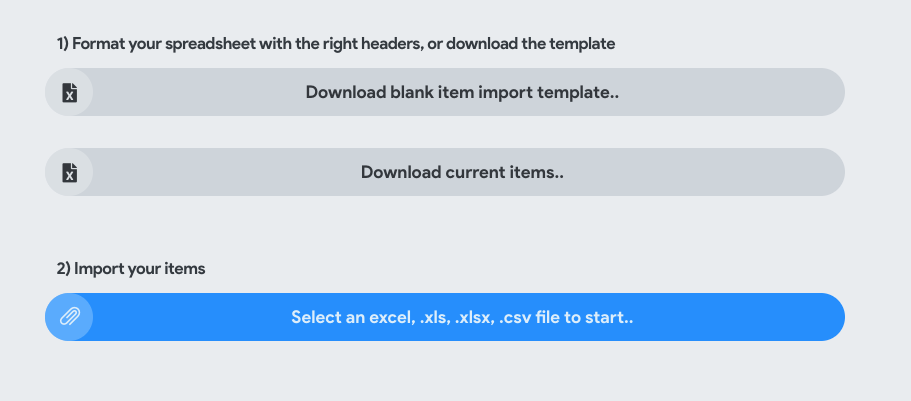
Download the spreadsheet item template
Add your items to the template, or adopt the spreadsheet column titles in your existing spreadsheet. NOTE: You can delete any columns that you do not need (minimum quantity, labor rate, etc.). If you want to use a custom category, labor type, or item type make sure it is added to your account before you import the sheet. You can also use the standard item/labor types found here: Item Import Types
Upload your spreadsheet in the space provided
Map the columns to CostCertified field equivalents using the dropdown menus.
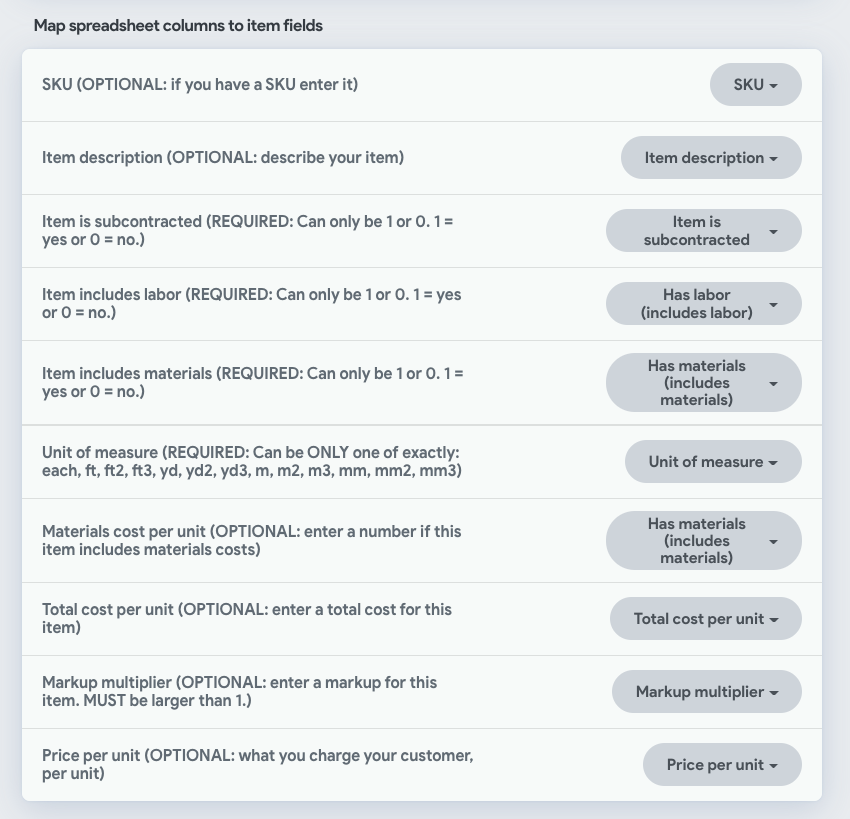
NOTE: If you have any columns that are only used for internal purposes (like color), you can tell the import tool to ignore these columns by clicking the dropdown and then clicking to remove the pre-selected field.

Choose a key column (this is how we match the uploads to already existing items in the database. You can choose name, ID (if you have the item ids in your spreadsheet), or SKU field which can be an external field you have or that comes from your manufacturer. The import function will attempt to update first by searching for items based on the key field, and if not found, will create a new item instead.
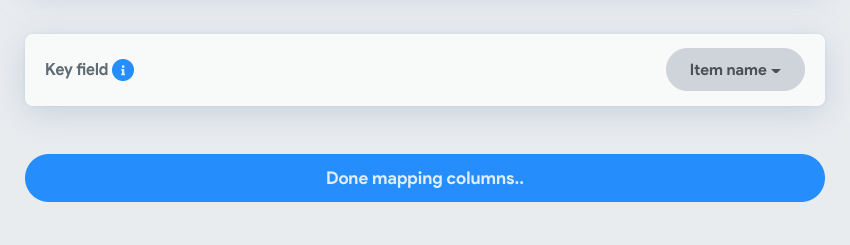
Click Done mapping columns..
Now you will see a table full of the items, staged and ready to go, you can make some last minute changes if you like.

If an item does not have a category, item type, or labor type specified, the system will try to guess the appropriate one based on the name of the item. These can be adjusted using the dropdown menus.
Then click Import
...