For most items that are measured based on the dimension of the job, you can link the quantity to a dimension in the parent assembly. For example, you may have multiple items priced based on floor area, wall perimeter, etc. Linking is useful because you can change the dimension in one space and have it reflected in multiple items. Here are the steps:
To begin, click the chain next to the dimension to open the window to select which dimension most accurately describes this measurement.

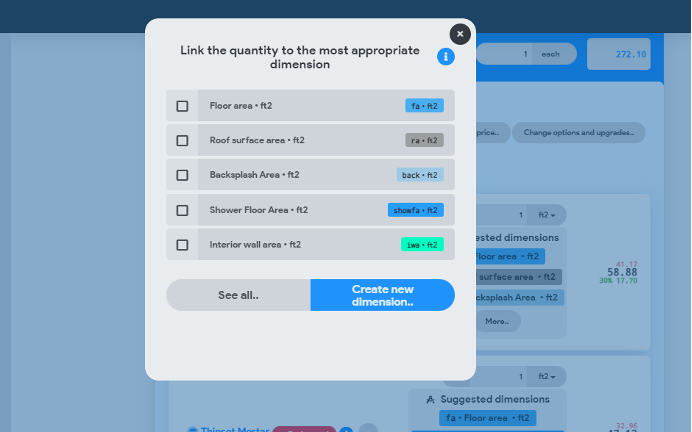
Once clicked, it will open the dimension window. The program will guess which dimension is most appropriate based on the item. If you don’t see a dimension that accurately describes your measurement in the initial view, click “See all” to view the full list of dimensions.
Click on the dimension that you want to link to. Once clicked, it will place a box on top of your assembly and color in the measurement box on the line item with the color associated with the dimension you chose. This box is where you will change that dimension from now on instead of from the line item. You can link as many items to that dimension as needed.

NOTE: In CostCertified, when a dimension window is colored in, it means it is pulling that dimension from somewhere else. If it is gray with a chain link to the left, it tells you that is the location to enter that measurement.
Your dimension is linked. Once the assembly is saved, whenever you use it in the future, you will simply have to enter those dimensions on top and your proposal will be built for you. How-To Video